Paint Booth

June 22, 2011

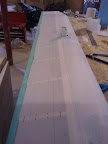
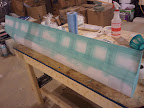
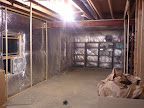
Well I haven’t done too much other than re-arrange the the basement so that I could build my 11X22X9 ft paint booth. I used my upper floor joists liberally to hold onto the 2 mil plastic. I also used about 40 1X8 firing strips for the structure. And I will use probably 4 16X26 fan filters. The entire thing cost me about $100 to make which includes the fans and is almost completely sealed seams using packing tape. Oh yeah and it took 5 9X12 rolls of 2mil plastic to enclose. One of the features is that two of the panels are on hinges that fold up so that I can get things into the booth easily and also so that I can walk through when I am not using it.


Finishing tapes on the upper right aileron and tip cap fabric

June 11, 2011

Well today I got back off my short week long summer vacation to the beach and got right back down to the basement to finish taping my upper right aileron.  If you remember from the previous post I had only taped the ribs but still needed to tape the spars, the trailing edge and the bottom side ribs.  After I had all those taped and drying I decided to get the tip cap fabric installed which is a PITA (pain in the ass) You have to do quite a bit of shrinking the fabric to get it to make the shape and even to that end I had to make a small slit to make it around the nose in nice shape.  I finished those on the other ailerons as well.  Its almost time for some eko fill!

The picture below is an example of the tip caps I was talking about, and yes I have a little trimming to do on the trailing edge.


Time spent today 5 hours

Total time spent 699 hours


Rib stitching and taping the upper right aileron

June 4, 2011

Today I got down the basement and immediately cut all the re-enforcing tape and started rib stitching.  I’ve the stitching down pretty good but after about 2 ribs I needed to put anti-chafe tape on my fingers.  I imagine that the wings are going to be quite fun with all those stitches.  After that was done I measured and cut all the rib tapes and started gluing the top surface in place.

Time spent today 3 hrs

Total time spent 692 hrs


Covering the upper right aileron

June 3, 2011

Tonight I got down to the basement and immediately started in on the upper right aileron. I started by a general cleaning with some alcohol to get the dust and prints off of it. I think anti-chafe taped the ribs, spars and trailing edges. After that was all done I cut a piece of fabric off my big roll and set it aside while I glued the surfaces that I want the fabric to stick too. After a while I had the fabric all glued on and brought up to the 350 deg temp. The last things I did was mark the tape locations and install the rib re-reinforcing tape and pre-punch the rib stitch holes.

Time spent 4.5 hours
Total time spent 689 hours


Stitching and taping the lower right aileron

June 2, 2011

Tonight I got right down to basement to start marking the lower right aileron for stitches and tapes. Once they were marked I cut and taped on the re-in-forcing tape on the ribs and started stitching. It went much faster than the two times before. Once that was done cut and glued on the rib tapes and the leading edge taper tape. After that I installed the taper transition tape and the finally the two spar tape (upper and lower side) and the trailing edge tape. Other than the two end tapes this aileron is done.

Time spent today 4 hours
Total time spent 684.5 hours


Covering the lower right aileron

June 1, 2011

Tonight I decided to get back to work after a long memorial day weekend full of 4 days of wakeboarding fun. I got to work covering the aileron by gluing the edges just like I did before. I was able to get the whole thing covered and shrunk to 350 deg tomorrow will be rib stitching.

Time spent today 2.5 hours
Total time spent 680.5 hours